How to Use Grammarly to Write Better
How to use Grammarly to write better, faster, and with more confidence. A practical, step-by-step guide to every feature that matters.
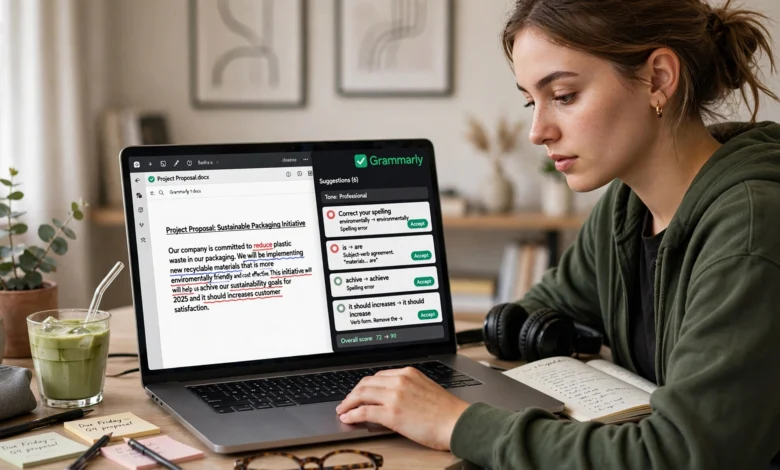
If you’ve ever hit send on an email and then spotted a typo three seconds later, you already know why so many people search for how to use Grammarly. It’s one of the most popular writing tools on the internet, and for good reason. Grammarly checks your grammar, spelling, punctuation, tone, and clarity in real time, no matter where you’re typing.
But here’s the thing: most people only use about 20% of what Grammarly can actually do. They install the browser extension, accept a few red underline fixes, and call it a day. That’s fine if you just want basic spell check. It’s a missed opportunity if you actually want to write better.
This guide walks through exactly how to use Grammarly, from installation to the more advanced features like tone detection, clarity scoring, and its generative AI tools. Whether you’re a student polishing an essay, a professional sending client emails, or a blogger trying to sound more like yourself and less like a robot, you’ll find practical steps here you can use today. By the end, you’ll know which Grammarly features actually move the needle and which ones you can safely ignore.
Let’s get into it.
What Is Grammarly and Why It Matters for Better Writing
Grammarly is an AI-powered writing assistant that reviews your text as you type and flags issues with grammar, spelling, punctuation, tone, clarity, and style. It works as a browser extension, a desktop app, a mobile keyboard, and plugins for tools like Microsoft Word and Google Docs, so it follows you into almost every app where you write.
What sets Grammarly apart from a basic spell checker is context. Instead of just flagging “this word looks misspelled,” it analyzes the sentence around it to understand what you actually meant. That’s why it can catch things like a misused “their” versus “there,” an awkward passive construction, or a sentence that technically has no grammar errors but still reads as confusing.
For anyone who writes regularly, whether that’s emails, reports, articles, or social posts, learning how to use Grammarly properly can genuinely change the quality of your output. It won’t write your ideas for you (not entirely, anyway), but it will catch the small errors that undercut your credibility and help you tighten up sentences that ramble.
Getting Started: How to Use Grammarly Step by Step
Before you can benefit from any of Grammarly’s smarter features, you need to set it up correctly. Here’s the process.
Step 1: Create Your Account and Install Grammarly
Head to the official Grammarly website and sign up with your email or a Google account. From there:
- Install the browser extension for Chrome, Firefox, Safari, or Edge so Grammarly can check your writing on Gmail, LinkedIn, Slack, and most other web apps.
- Download the desktop app if you write a lot in Word, Notion, or other desktop software.
- Add the mobile keyboard if you want grammar checking while texting or writing on your phone.
- Install the Grammarly for Word or Grammarly for Google Docs add-in if those are your main writing tools.
You don’t need all four. Pick the ones that match where you actually write.


Step 2: Set Your Writing Goals
This is the step most people skip, and it’s a mistake. When you open a document in Grammarly for the first time, it asks you to set goals for that piece of writing:
- Audience — general, knowledgeable, or expert
- Formality — informal, neutral, or formal
- Domain — academic, business, creative, casual, or technical
- Tone — the emotional register you’re going for
- Intent — inform, describe, convince, tell a story
Setting these correctly is what makes Grammarly’s suggestions actually useful. If you’re writing a casual text to a friend but Grammarly thinks you’re writing a formal business report, it’ll suggest changes that make your message sound stiff and weird. Take the ten seconds to set your goals properly, and the suggestions immediately get smarter.
Step 3: Start Writing and Reviewing Suggestions
Once your goals are set, just write normally. Grammarly underlines issues in different colors depending on the category (red for correctness, blue for clarity, and so on). Click any underlined word or phrase to see the suggested fix and a short explanation of why it’s flagged.
Don’t accept every suggestion blindly. Read the explanation first. Sometimes Grammarly’s suggestion doesn’t fit your intended meaning or voice, and that’s fine. You’re the writer. Grammarly is the editor sitting next to you, not the one holding the pen.
Key Grammarly Features That Help You Write Better
Now let’s get into the features that actually make a difference. This is where most people stop exploring, but it’s also where the real value is.
Grammar and Spelling Checks
This is the foundation. Grammarly catches:
- Subject-verb agreement errors
- Misused homophones (their/there/they’re, its/it’s)
- Run-on sentences and comma splices
- Misplaced modifiers
- Basic spelling mistakes and typos
What makes this more useful than the built-in spell checker in most word processors is that Grammarly looks at whole sentences and paragraphs, not isolated words. According to the Purdue Online Writing Lab, context-aware grammar review catches a meaningfully higher percentage of real writing errors than tools that check words in isolation, which is exactly the gap Grammarly is built to close.
Tone Detection
One of the more underused features is tone detection. Grammarly analyzes your writing and tells you how it’s likely to come across: confident, friendly, formal, tentative, urgent, and so on. This is genuinely useful for emails and messages where tone can easily be misread.
Here’s how to use it well:
- Write your message as you normally would.
- Check the tone indicator, usually shown as an icon near your text or in the sidebar.
- If the tone doesn’t match your intent (say, you wanted to sound assertive but it reads as apologetic), review the specific phrases Grammarly flags.
- Adjust word choice and sentence structure based on the suggestions.
This matters more than people realize. A message that reads as “blunt” to you might read as “rude” to someone else, and catching that mismatch before you hit send can save you an awkward follow-up conversation.
Clarity and Conciseness Suggestions
Grammarly Premium goes beyond correctness and flags sentences that are technically fine but hard to read. It’ll suggest:
- Breaking up long, winding sentences
- Cutting redundant phrases (“in order to” becomes “to”)
- Replacing vague words with more specific ones
- Restructuring passive voice into active voice where it strengthens the sentence
If your writing tends to be wordy, this feature alone is worth the upgrade. It won’t rewrite your voice, but it will nudge you toward tighter, more direct sentences, which almost always read better.
Plagiarism Checker
Available on paid plans, Grammarly’s plagiarism checker scans your text against billions of web pages and academic sources. This is especially useful for students and content writers who need to make sure their work is original before submitting it. It flags matching passages, shows the source, and gives you a percentage of unoriginal content so you know exactly what to revise.
Generative AI Writing Assistance
Grammarly’s generative AI tools can help you draft outlines, rewrite paragraphs, brainstorm ideas, and adjust the length or tone of existing text. This is different from tools that generate entire articles from a prompt. Grammarly’s AI features are built to work with what you’ve already written, refining and expanding rather than starting from a blank page.
Use this feature when you’re stuck on how to phrase something, not as a replacement for your own thinking. The best writing still comes from you; Grammarly’s AI is there to smooth the rough edges.
How to Use Grammarly Across Different Platforms
One of Grammarly’s biggest strengths is how many places it actually works. Here’s a quick breakdown:
- Gmail and Outlook — checks emails as you draft them, before you send
- Google Docs and Microsoft Word — reviews full documents, including long-form writing
- Slack, Teams, and LinkedIn — flags typos and tone issues in quick messages and posts
- Social media — reviews captions and posts for clarity and tone before you publish
- Code editors — for developers, Grammarly can check comments, README files, and documentation without flagging variable names as spelling errors
The takeaway here is simple: install Grammarly once and it works nearly everywhere you type, so you’re not switching between apps to get your writing checked.
Grammarly Free vs Grammarly Premium: Which Should You Choose
This is a common question, and the honest answer depends on how much you write and how polished it needs to be.
Grammarly Free covers:
- Basic grammar and spelling checks
- Punctuation correction
- Tone detection (basic version)
- Sentence structure suggestions
Grammarly Premium adds:
- Advanced clarity and conciseness suggestions
- Vocabulary enhancement and word choice alternatives
- Full plagiarism checking
- Genre-specific style suggestions (academic, business, creative)
- Generative AI writing features
If you’re writing casual emails and social posts, the free version is probably enough. If you’re a student, a professional writer, or someone sending client-facing communications regularly, Premium pays for itself pretty quickly in the amount of editing time it saves you.
Tips to Get the Most Out of Grammarly
A few practical habits that make a real difference:
- Set your goals for every new document. Don’t skip this step, even for short pieces. It changes the quality of every suggestion that follows.
- Read the explanations, not just the suggestions. Understanding why something is flagged helps you improve as a writer over time, not just fix the current sentence.
- Use the tone detector before sending important messages. A quick check before you hit send can prevent miscommunication.
- Don’t accept every suggestion automatically. Grammarly is a tool, not a final authority on your voice. Trust your judgment when a suggestion doesn’t fit.
- Check your weekly writing insights. Premium users get a summary of common mistakes and improvement trends, which is genuinely useful for spotting patterns you might not notice on your own.
- Turn on the browser extension everywhere you write online, not just in email. Comments, forum posts, and social captions benefit too.
- Use custom style guides if you’re writing for a brand or team. Business plans let you set preferred terminology so everyone’s writing stays consistent.
Common Mistakes to Avoid When Using Grammarly
Knowing how to use Grammarly also means knowing what not to do with it.
- Relying on it as a substitute for editing your own work. Grammarly catches surface-level issues, but it won’t tell you if your argument is weak or your structure doesn’t make sense.
- Ignoring context-specific writing. If you’re writing dialogue, poetry, or intentionally informal content, some of Grammarly’s suggestions won’t apply. Use your judgment.
- Skipping the goal-setting step. As mentioned earlier, this single step dramatically affects suggestion quality.
- Accepting AI rewrites without reviewing them. Generative suggestions can shift your meaning slightly. Always read the rewritten version carefully before using it.
- Forgetting it needs an internet connection for most features. Grammarly’s advanced suggestions run in the cloud, so offline mode only covers very basic spell check.
Conclusion
Learning how to use Grammarly properly comes down to a few simple habits: install it where you actually write, set your goals for every document, pay attention to tone and clarity suggestions instead of just correctness fixes, and use the AI features to refine your work rather than replace your thinking. Grammarly won’t turn a weak idea into a strong one, but it will catch the errors that quietly undermine good writing and help you tighten sentences until they say exactly what you mean.
Whether you stick with the free version or upgrade to Premium, the tool only pays off if you actually engage with its suggestions instead of clicking through them on autopilot. Use it consistently, read the explanations, and you’ll notice your writing get sharper without much extra effort.