How to Build Your First PC Step by Step
Learn how to build your first PC step by step in 2026. This ultimate beginner's guide covers parts, assembly, BIOS setup, and OS installation — no experience needed.
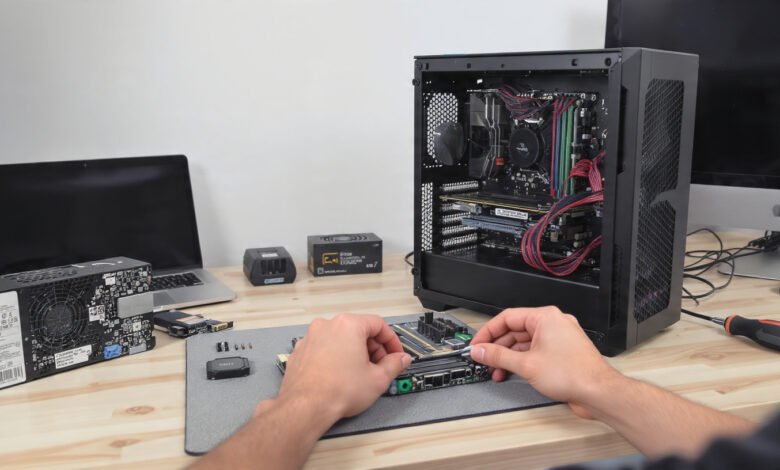
How to build your first PC is one of the most searched phrases in the tech world, and for good reason. Every year, hundreds of thousands of people decide to stop settling for overpriced pre-built machines and take matters into their own hands. The result? A custom system that fits their exact needs, performs better per dollar, and can be upgraded piece by piece as technology moves forward.
If you have been putting this off because it feels overwhelming, here is the honest truth: building a PC in 2026 is more beginner-friendly than it has ever been. Components are more standardized, compatibility tools have gotten smarter, and the community support online is massive. The physical assembly part is actually the easy bit. Most of the real work happens before you buy a single screw.
This guide walks you through the entire process from scratch. You will learn how to plan your build, choose compatible parts, assemble everything safely, configure your BIOS, install Windows, and get your drivers sorted. Whether you are building a budget gaming rig, a content creation workstation, or a solid everyday desktop, the fundamentals are the same.
No prior experience required. Just a screwdriver, some patience, and this guide.
How to Build Your First PC: What You Need to Know Before You Start
Before you touch a single component, there are a few decisions that will shape everything else. Skipping this planning phase is the most common mistake first-time builders make, and it almost always leads to wasted money or incompatible parts.
Define Your Use Case and Budget
The first question is not “which GPU should I buy?” It is “what is this PC actually for?”
- Gaming at 1080p: A solid build starts around $600–$800 in 2026. You do not need top-of-the-line hardware to get excellent frame rates at this resolution.
- Gaming at 1440p: Budget $1,000–$1,400 for a build that handles modern titles at high settings and smooth frame rates.
- 4K gaming or content creation: Expect to spend $1,500 and above. Video editing, 3D rendering, and 4K gaming all demand more horsepower.
- General use or work PC: You can put together a capable machine for $400–$600 that handles productivity, web browsing, and light media tasks without any issues.
Once you have a number in mind, stick close to it. It is easy to get pulled into spending more than you planned once you start browsing parts.
Use PCPartPicker to Plan Your Build
Before buying anything, head over to PCPartPicker. It is a free tool that lets you build out a parts list, automatically checks for compatibility issues, and shows you real-time prices from multiple retailers. If your CPU and motherboard socket types do not match, it will flag it immediately. This tool alone will save you from the most common and expensive mistakes first-time builders make.
The 7 Core Components of Every PC Build
Every desktop PC is built around the same seven core components. Understanding what each one does will help you make smarter buying decisions.
1. CPU (Central Processing Unit)
The CPU is the brain of your computer. It handles game logic, application processing, background tasks, and everything that is not directly related to rendering graphics. In 2026, the two main options are AMD Ryzen 9000 series processors and Intel Core Ultra 200 series chips.


For gaming, AMD’s Ryzen X3D lineup consistently delivers the best frame rates. For mixed productivity and gaming, both brands are competitive at similar price points. Always choose your CPU first, because it determines which motherboard socket you need.
2. Motherboard
The motherboard connects every component in your build. It has to be compatible with your CPU’s socket type: AM5 for AMD Ryzen 9000, and LGA1851 for Intel Core Ultra 200K. Both platforms now run DDR5 RAM, so check that before buying memory.
For most first-time builders, a mid-range B-series board (like B850 for AMD or B860 for Intel) hits the sweet spot between features and price. You do not need a flagship motherboard for your first build.
3. RAM (Memory)
DDR5 RAM is the standard in 2026. A minimum of 16GB is required for gaming, but 32GB is strongly recommended if you multitask, stream, or keep a browser open alongside your games. Most modern builders do all three.
When installing RAM, check your motherboard manual for the correct slots. Dual-channel mode (using two sticks instead of one) gives you a meaningful performance boost, and the slots are usually labeled A2 and B2.
4. Storage (NVMe SSD)
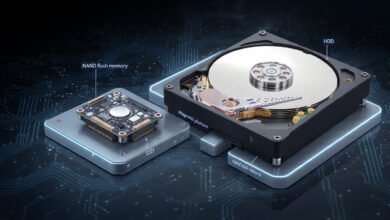
Mechanical hard drives are largely obsolete for primary storage. A PCIe 4.0 NVMe SSD is the baseline for any new build in 2026. It installs directly into the M.2 slot on your motherboard and offers read speeds around 7,000 MB/s, which means fast boot times and near-instant game loading.
Go with at least 1TB. Modern games regularly exceed 100GB each, so 2TB is the smarter long-term choice if your budget allows.
5. GPU (Graphics Card)
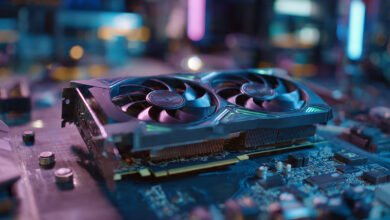
The GPU (graphics processing unit) is the most important component in a gaming or creative PC. It renders every frame on your screen. Spend roughly 35–40% of your total budget here.
In 2026, solid options include:
- Budget (1080p): NVIDIA RTX 5060 Ti or AMD RX 9060 XT
- Mid-range (1440p): NVIDIA RTX 5070 or AMD RX 9070 XT
- High-end (4K): NVIDIA RTX 5080
Install the GPU last in the assembly process. It is the largest component and takes up the most workspace, so you want everything else in place first.
6. Power Supply Unit (PSU)
The PSU powers every component in your build. Never cut corners here. A low-quality power supply can fail and take other components with it.
Look for a PSU with an 80 PLUS Gold rating or higher from a reputable brand like Seasonic, Corsair, or be quiet!. To calculate how much wattage you need, add up the TDP (thermal design power) of your CPU and GPU, then add a 150W safety margin. A build with an RTX 5070, for example, typically needs a 750W PSU.
For cable management, a semi-modular or fully modular PSU is worth the extra few dollars. You only connect the cables you need, which makes cable routing inside the case much cleaner.
7. PC Case
The case is both a housing and an airflow system. Choose one that fits your motherboard form factor (ATX is standard for most full-size builds), has good front-to-back airflow, and includes cable management routing options.
Brands like Fractal Design, NZXT, and Lian Li consistently get strong reviews for build quality and airflow at various price points. If you are buying a case with a glass panel, make sure the interior layout suits the way you plan to route cables.
Tools and Supplies You Need Before You Build
You do not need a full toolbox. Here is what you actually need:
- Phillips #2 screwdriver (magnetic tip is helpful)
- Anti-static wrist strap (or periodically touch an unpainted metal surface to discharge static)
- Zip ties or velcro straps for cable management
- Thermal paste (often included with CPU coolers, but worth having a spare tube)
- A clean, non-conductive, well-lit surface to work on
Keep the boxes and anti-static bags your components come in. If something does not work on first boot, you will want them for returns or troubleshooting.
Step-by-Step PC Assembly Guide
Now for the hands-on part. Work slowly and methodically. You are not racing anyone.
Step 1: Install the CPU onto the Motherboard
Start outside the case. Lay your motherboard flat on a clean, non-static surface (the original motherboard box works well).
- Open the CPU socket retention arm on the motherboard.
- Look for the small gold triangle on one corner of your CPU. This must align with the matching triangle on the socket.
- Gently lower the CPU straight down into the socket. Do not force it. It should settle in with zero pressure applied.
- Close and lock the retention arm.
For Intel processors, a protective plastic cover will pop off automatically as you lock the arm. Keep it in case you ever need to return the board.
Step 2: Install the CPU Cooler
Your CPU cooler keeps the processor from overheating. Most boxed CPUs include a basic cooler, but for any mid-range or high-performance build, an aftermarket air cooler or a 240mm or 360mm AIO liquid cooler is worth the investment.
- Apply a pea-sized drop of thermal paste to the center of the CPU’s heat spreader. If your cooler came with pre-applied paste, skip this step.
- Attach the cooler’s mounting bracket to the back of the motherboard (through the backplate hole).
- Lower the cooler onto the CPU and fasten it down in a diagonal pattern to apply even pressure.
- Connect the CPU fan cable to the CPU_FAN header on the motherboard.
Step 3: Install RAM
- Open the retention clips on your motherboard’s RAM slots.
- Check your manual for the correct slots (usually A2 and B2 for dual-channel mode).
- Align the notch in the RAM stick with the notch in the slot.
- Press down firmly and evenly on both ends until the clips snap into place.
You should hear a satisfying click. If the RAM is not fully seated, your PC will not POST on first boot.
Step 4: Install the NVMe SSD
- Find the M.2 slot on your motherboard (usually located between the CPU and the first PCIe slot, often under a heatsink cover).
- Remove the heatsink cover if there is one.
- Slide the NVMe SSD into the slot at roughly a 30-degree angle.
- Press it down flat and secure it with the small screw or tool-less latch.
- Reattach the heatsink cover.
If your board has two M.2 slots, use the top one. It connects directly to the CPU’s PCIe lanes, giving you the fastest speeds.
Step 5: Prepare the Case
Before dropping the motherboard in:
- Install the I/O shield (the metal backplate that came with your motherboard) into the rectangular cutout at the rear of the case. Some newer boards have this pre-attached.
- Confirm that motherboard standoffs are correctly installed in your case. These are the small brass posts the motherboard screws into. Using the wrong standoff positions can short out your board.
Step 6: Mount the Motherboard
Carefully lower the motherboard into the case, aligning the rear ports with the I/O shield. Line up the screw holes with the standoffs and fasten the board down with the provided screws. Do not overtighten.
Step 7: Install the Power Supply
- Mount the PSU in its bay (usually at the bottom rear of the case). Orient the PSU fan toward the bottom vent if your case has one; otherwise face it up into the case.
- Secure it with the four screws on the back panel.
- Route the cables through the cable management channels before connecting anything.
Step 8: Install the GPU
- Remove the PCIe slot covers from the rear of your case (usually two slots).
- Unlock the PCIe x16 slot on your motherboard (there is a small retention clip at the end).
- Align the GPU and press it firmly into the slot until the clip clicks.
- Screw the GPU bracket into the case.
- Connect the PCIe power cables from your PSU to the GPU.
Step 9: Connect Case Cables
This is where patience pays off. You need to connect:
- Front panel connectors (power button, reset button, HDD LED, power LED) to the pins on your motherboard. Check your manual for the exact pin layout.
- USB 3.0 header for front-panel USB ports.
- HD audio header for front-panel headphone and mic jacks.
- SATA data cables for any additional storage drives.
Cable management is not just aesthetic. Clean routing improves airflow, which keeps your components running cooler and quieter.
First Boot and BIOS Configuration
Doing a Test Boot Before Closing the Case
Before you close everything up, do a test boot with the side panels off. Connect:
- Monitor to the GPU’s HDMI or DisplayPort output (not the motherboard)
- Keyboard and mouse to rear USB ports
- Power cable to the PSU
Flip the PSU switch on and press the power button. If your system POSTs (you see a BIOS screen or the motherboard logo), you are in great shape.
Configuring BIOS Settings
Once you are in the BIOS, there are a few things to check:
- Enable XMP or EXPO so your RAM runs at its rated speed, not the default (slower) JEDEC speed.
- Set the boot order to prioritize your USB drive for OS installation.
- Verify that your NVMe SSD is detected.
- Check CPU and RAM temperatures to confirm your cooler is seated correctly.
Installing Windows and Drivers
Creating a Bootable USB Drive
Download the Windows 11 Media Creation Tool from Microsoft’s official website at microsoft.com/software-download. Run the tool on another PC and create a bootable USB drive (8GB or larger).
Plug the USB into a rear USB 3.0 port on your new build, boot from it, and follow the on-screen instructions. Select your NVMe SSD as the installation drive.
Installing Drivers
After Windows is up and running, install drivers in this order:
- Motherboard chipset drivers (from your board manufacturer’s website)
- GPU drivers (from NVIDIA, AMD, or Intel’s official sites — always get these directly, never from third-party sources)
- Network, audio, and peripheral drivers as needed
Many motherboard manufacturers also offer a utility that scans for and installs drivers automatically, which is handy for first-time builders.
Running Your First Performance Check
Use free tools like HWMonitor or Cinebench to check temperatures and system stability after installation. Idle CPU temperatures should be under 50°C, and under load they should stay below 85–90°C for most coolers. If temps are higher than expected, double-check that your cooler is properly seated and that thermal paste was applied correctly.
Common First-Build Mistakes (and How to Avoid Them)
Even with a good guide, first-time builders run into the same pitfalls. Here are the most common ones:
- Plugging the monitor into the motherboard instead of the GPU. Your dedicated GPU handles display output. The motherboard video port is for integrated graphics only and will leave your GPU completely idle.
- Not enabling XMP/EXPO in BIOS. Your RAM will run slower than its rated speed until you turn this on.
- Skipping the test boot. Always test outside the case before fully assembling. It is much easier to troubleshoot with everything accessible.
- Forgetting to install the I/O shield before mounting the motherboard. You will have to remove the board to fix this.
- Underrating the PSU. Leaving no headroom on your power supply causes instability under heavy load. Always add that 150W margin.
- Static electricity damage. Touch an unpainted metal surface regularly while building, or wear an anti-static wrist strap.
Troubleshooting Your New Build
If your PC does not boot on the first try, do not panic. Work through this checklist:
- Is the PSU switch turned on?
- Are all power cables fully seated, including the 24-pin motherboard connector and the 8-pin CPU power connector?
- Is the RAM fully seated in the correct slots?
- Is the GPU fully locked into the PCIe slot?
- Is your monitor connected to the GPU output, not the motherboard?
If your motherboard has debug LEDs or a POST code display, check your manual to interpret the codes. Most issues trace back to one of the above.
PC Building Checklist Before You Power On
Use this as your final checklist before hitting the power button:
- [ ] CPU installed and retention arm locked
- [ ] Thermal paste applied and CPU cooler secured
- [ ] RAM seated in the correct dual-channel slots
- [ ] NVMe SSD installed and heatsink reattached
- [ ] Motherboard standoffs in correct positions
- [ ] Motherboard mounted and screwed down
- [ ] I/O shield installed
- [ ] PSU mounted and oriented correctly
- [ ] GPU seated and locked in PCIe slot
- [ ] PCIe power cables connected to GPU
- [ ] 24-pin ATX power connected to motherboard
- [ ] 8-pin (or 4+4-pin) CPU power connected
- [ ] Front panel connectors plugged in
- [ ] USB and audio headers connected
- [ ] All case fans connected to fan headers or PSU
- [ ] Monitor plugged into GPU output
How Long Does It Take to Build a PC?
For a first-time builder, expect three to five hours from opening boxes to your first Windows login. The physical assembly usually takes one to two hours. The rest of the time goes into cable management, BIOS configuration, and OS installation.
Do not rush. Take breaks if you need them. A careful, methodical approach will always get you further than speed.
Conclusion
Building your first PC step by step is one of the most rewarding things you can do as a tech enthusiast, and this guide has covered everything you need to do it right: setting a realistic budget, choosing compatible components using tools like PCPartPicker, assembling your CPU, motherboard, RAM, NVMe SSD, GPU, PSU, and case in the correct order, running a test boot before closing things up, configuring your BIOS settings, installing Windows 11, and getting your drivers up to date. Avoid the common mistakes, work patiently through any troubleshooting, and you will end up with a custom machine that outperforms any equivalently priced pre-built system and gives you the satisfaction of knowing you built it yourself.