How to Set Up Dual Monitors at Home
Learn how to set up dual monitors at home with our easy 7-step guide. Boost productivity, fix display issues, and build a pro workspace fast.
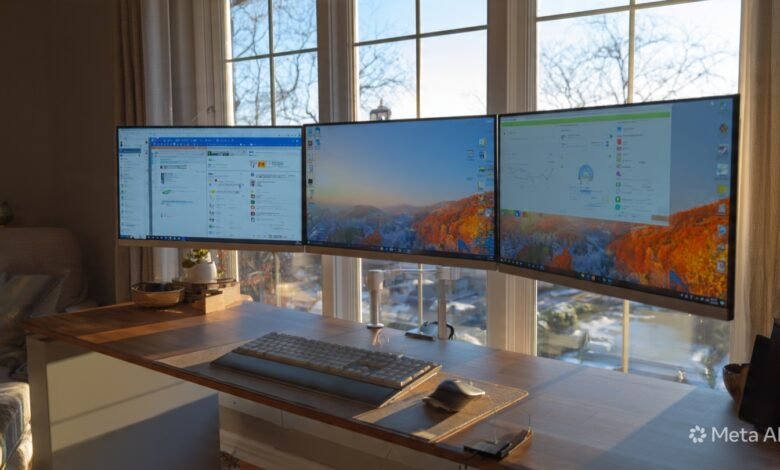
If you’ve ever felt cramped trying to write a report on one half of your screen while keeping a spreadsheet open on the other, you already know the answer: more screen space changes how you work. Learning how to set up dual monitors at home is one of those small upgrades that quietly transforms your day. It cuts down on the constant alt-tabbing, gives you more room to think, and makes everything from video calls to gaming feel less claustrophobic.
The good news is that a dual monitor setup at home is much simpler than most people expect. You don’t need an IT degree, a fancy docking station, or an expensive new computer. In most cases, you need a second monitor, the right cable, and about thirty minutes of patience. Whether you’re working remotely, streaming on Twitch, editing photos, day-trading, or just tired of one tiny laptop screen, this guide will walk you through every step.
In this article, we’ll cover what hardware you need, how to connect everything, how to configure display settings on Windows and Mac, the best cable types to use, and how to fix the most common problems. By the end, you’ll have a clean, productive two-monitor setup that actually feels professional. Let’s get into it.
Why Set Up Dual Monitors at Home?
Before we dig into the how, it’s worth talking about the why. A dual monitor setup isn’t just a nice-to-have. Studies and user surveys have consistently shown that multi-monitor setups can boost productivity by anywhere from 20% to 40%, depending on the type of work. According to a University of Utah research summary referenced by Jon Peddie Research, users with multiple displays complete tasks faster and with fewer errors than those working on a single screen.
Here’s where having a second monitor really pays off:
- Office work and writing. Keep your document on one screen and your research, email, or notes on the other.
- Spreadsheets and finance. Stretch a wide spreadsheet across two screens, or compare two workbooks side by side.
- Video editing and design. Use one display for your timeline and the other for the preview.
- Programming and development. Code on one monitor, run your terminal, browser, or documentation on the other.
- Gaming and streaming. Play full-screen on one monitor and run Discord, OBS, or chat on the other.
- Online meetings. Keep your video call on one screen and your shared document or notes on the other.
A home dual monitor setup also reduces the mental fatigue of constantly switching windows. Your brain spends less energy hunting for the right tab, which means you can stay in flow longer.
What You Need Before Setting Up Dual Monitors at Home
Let’s make sure you have everything before you start unboxing things and crawling under your desk. Here’s the full checklist for a clean dual monitor setup at home.
Hardware You’ll Need
- A computer with at least two video outputs. Most modern desktops and laptops support dual displays out of the box, but you should confirm before buying a second monitor.
- Two monitors. They don’t have to be identical, although matching models do look cleaner. We’ll talk about mixing and matching later.
- Cables that match your ports. This is where most people get stuck. Check both your computer’s outputs and your monitor’s inputs.
- Adapters or docking station (optional). If your laptop only has USB-C, you may need a hub or adapter.
- Monitor stand, arm, or riser. Optional, but a monitor arm dramatically improves your posture and frees up desk space.
- Power outlets and a surge protector. Each monitor needs its own plug.
Software You’ll Need
- An updated operating system (Windows 10, Windows 11, macOS, or a recent Linux distribution).
- The latest graphics card drivers, especially if you have an NVIDIA, AMD, or Intel GPU.
- A few minutes to dig into the display settings menu.
That’s really it. Once you have these pieces, the rest is mostly plug and play.
How to Set Up Dual Monitors at Home: Step-by-Step Guide
Now for the main event. Here’s the full process broken into seven simple steps. Follow these in order and you’ll have your dual monitor workstation up and running in no time.
Step 1: Check Your Computer’s Video Outputs
Flip your computer around and look at the back (or the sides, if it’s a laptop). You’re looking for video output ports. The most common ones include:


- HDMI (a flat, slightly trapezoid-shaped port)
- DisplayPort (similar shape, with one corner cut)
- USB-C / Thunderbolt (small, oval, reversible)
- DVI (older, large, with lots of pins)
- VGA (older, blue, trapezoid with screws)
If you have at least two of these (in any combination), you can run dual monitors. Laptops usually have one external port plus the built-in screen, which counts as your second display. If your desktop only has one video output, you may need to install a graphics card with multiple ports or use a USB-to-HDMI adapter.
Pro tip: A dedicated GPU almost always supports multiple monitors. Integrated graphics chips on cheap desktops sometimes only support one external display, so check the specs of your motherboard or CPU.
Step 2: Choose the Right Monitors
Picking the right second monitor depends on what you’ll use it for. Here are the main specs to think about:
- Size. 24 to 27 inches is the sweet spot for most home offices. Bigger isn’t always better if your desk is small.
- Resolution. 1080p (Full HD) is fine for general use. 1440p (QHD) is the sweet spot for productivity and gaming. 4K is great for design, video, and high-detail work.
- Refresh rate. 60Hz is fine for office work. Gamers should look for 120Hz, 144Hz, or higher.
- Panel type. IPS panels offer the best color accuracy and viewing angles. VA gives deeper blacks. TN is fast but looks washed out.
- Ports. Make sure the monitor has the input you plan to use.
- VESA mount support. If you ever want a monitor arm, you’ll need this.
If you want help picking, RTINGS publishes detailed monitor reviews with side-by-side comparisons that go deep into color accuracy, response time, and motion handling.
Step 3: Get the Correct Cables
This is the step where most beginners hit a wall. Even if your monitor comes with one cable, it might not be the right one for your computer.
Match your cable to whichever port type you’re using:
- HDMI to HDMI for most modern setups
- DisplayPort to DisplayPort for higher refresh rates and better bandwidth
- USB-C to HDMI or DisplayPort for newer laptops
- DVI to HDMI if you’re mixing an older monitor with a newer computer
- Thunderbolt for daisy-chaining compatible monitors
Always buy a cable that supports the bandwidth your monitor needs. A cheap HDMI cable might cap your 4K monitor at 30Hz instead of 60Hz, which feels laggy and unpleasant. For 4K at 60Hz or higher, look for HDMI 2.0 or 2.1 and DisplayPort 1.4 or newer.
Step 4: Connect the Monitors Physically
Now the fun part. Here’s the order I recommend:
- Power off your computer (not strictly required, but it avoids edge cases).
- Plug each monitor into a power outlet using its included power cable.
- Connect each monitor to your computer using the appropriate video cable.
- Turn on both monitors first, then power up your computer.
In most cases, your operating system will detect both displays automatically and extend the desktop. If only one screen lights up, don’t panic. We’ll fix that in the next step.
Step 5: Configure Display Settings on Windows
If you’re on Windows 10 or Windows 11, here’s how to fine-tune your dual monitor setup:
- Right-click on your desktop and select Display settings.
- You’ll see numbered boxes representing each monitor. Click Identify to see which is which.
- Drag the boxes to match the physical arrangement of your monitors. If your second screen is to the right, the box should be on the right.
- Scroll down to Multiple displays and choose Extend these displays. This gives you one continuous workspace across both screens.
- Under each monitor, set the correct resolution, scale, and orientation.
- Set your primary display by selecting the monitor and checking Make this my main display. Your taskbar and desktop icons will appear here.
Microsoft has a helpful walkthrough on their official Windows display support page if you run into any roadblocks.
Step 6: Configure Display Settings on Mac
On macOS, the process is just as straightforward:
- Click the Apple menu, then System Settings (or System Preferences on older macOS).
- Select Displays.
- You’ll see your connected monitors listed.
- Click Arrange and drag the displays so they match your physical layout.
- Drag the white menu bar to the screen you want as your primary monitor.
- Adjust resolution and scaling under each display’s settings.
If your Mac doesn’t detect a monitor, click Detect Displays while holding the Option key in the Displays settings.
Step 7: Arrange and Calibrate Your Monitors
Once both monitors are working, take a few minutes to fine-tune. This is the difference between a setup that works and a setup that feels great.
- Match the heights. The tops of your monitors should be at roughly the same level.
- Set your viewing distance. Aim for an arm’s length away (about 20 to 30 inches).
- Adjust brightness and color temperature. Both monitors should look similar so your eyes don’t strain when shifting.
- Calibrate colors if you do any creative work. Windows and Mac both have built-in calibration tools, or you can use a hardware colorimeter for serious accuracy.
- Tilt and rotate to reduce glare from windows and lights.
A small detail like monitor calibration makes a huge difference, especially if you edit photos or watch a lot of video.
Best Cable Types for a Dual Monitor Setup
Cables are boring until they don’t work. Here’s a quick breakdown of which cable to use and when.
HDMI
The most common option. HDMI carries video and audio over a single cable and works with almost every monitor sold today. HDMI 2.0 supports 4K at 60Hz, while HDMI 2.1 can handle 4K at 120Hz or 8K at 60Hz. Great for casual users, gamers, and anyone with a TV-style monitor.
DisplayPort
The pro choice. DisplayPort generally offers higher bandwidth than HDMI of the same generation, supports adaptive sync, and handles multiple displays through daisy-chaining. DisplayPort 1.4 and 2.0 are the current standards. If your computer and monitor both have it, use DisplayPort.
USB-C and Thunderbolt
The future. A single USB-C cable can carry video, data, and power. Thunderbolt 3 and Thunderbolt 4 allow you to daisy-chain multiple high-resolution monitors with one connection. This is especially handy for laptops where you don’t want a tangle of cables.
DVI
Mostly obsolete but still useful for older monitors. DVI carries video only (no audio), and Dual-Link DVI can support resolutions up to 2560×1600.
VGA
Avoid if possible. VGA is an analog standard and produces noticeably softer images at higher resolutions. Only use it if you have no other option.
Common Dual Monitor Problems and How to Fix Them
Even a perfect dual monitor setup at home can hit a snag. Here are the most common issues and quick fixes.
Problem 1: Second Monitor Not Detected
- Make sure the cable is firmly plugged in on both ends.
- Try a different cable (cables fail more often than people realize).
- Test the monitor on a different computer.
- In Windows display settings, click Detect.
- On a Mac, hold Option and click Detect Displays.
- Update your graphics card drivers.
Problem 2: Wrong Resolution or Blurry Display
- Open Display settings and set the recommended resolution for each monitor.
- If text looks tiny, adjust the scaling to 125% or 150%.
- Make sure your cable supports the bandwidth your monitor needs.
Problem 3: Mouse Won’t Cross Between Screens
This usually means your virtual monitor arrangement doesn’t match the physical one. Open Display settings and drag the screen icons to match how the monitors actually sit on your desk.
Problem 4: Wrong Primary Display
- On Windows, select the monitor and check Make this my main display.
- On Mac, drag the menu bar to the monitor you want as primary.
Problem 5: Flickering or Screen Tearing
- Match the refresh rates of both monitors when possible.
- Try a different cable, especially if you’re running 4K at 60Hz or higher.
- Disable G-Sync or FreeSync temporarily to test.
Problem 6: One Monitor Goes to Sleep While the Other Stays Active
This is usually a power management quirk. Open your power settings and adjust the screen timeout, or update your monitor’s firmware if available.
Tips for an Ergonomic Dual Monitor Setup
A great home dual monitor setup isn’t just about the screens. It’s about how you sit, where you look, and how your body feels at the end of the day. Here’s what to keep in mind.
Eye Level Matters
The top of each monitor should be at or just below eye level. If you have to look down, your neck will thank you. Looking up causes dry eyes and shoulder tension.
Distance From Your Eyes
Aim for about 20 to 30 inches from your face. A common test: stretch your arm straight out, and the screen should sit roughly at your fingertips.
Use a Monitor Arm
A dual monitor arm is the single biggest upgrade for an ergonomic setup. It clears desk space, lets you adjust height instantly, and makes it easy to switch between portrait and landscape.
Lighting
- Avoid placing monitors directly in front of or behind a window.
- Use soft, indirect lighting to reduce glare.
- A bias light behind the monitors reduces eye strain during long sessions.
Take Breaks
The 20-20-20 rule still applies even with two screens. Every 20 minutes, look at something 20 feet away for 20 seconds.
Best Dual Monitor Configurations for Different Uses
Not every dual monitor configuration suits every kind of work. Here are setups tailored to specific use cases.
Productivity and Office Work
- Two 27-inch 1440p monitors placed side by side.
- Both in landscape.
- Slight inward angle for comfort.
Gaming
- Primary monitor with a high refresh rate (144Hz or higher).
- Secondary monitor for Discord, browser, music, or a stream chat.
- The primary monitor should be directly in front of you.
Programming and Development
- One monitor in portrait orientation for reading long code files.
- One monitor in landscape for browser, terminal, and documentation.
- Many developers swear by this combination.
Photo and Video Editing
- Two color-accurate IPS panels, ideally calibrated to match.
- One for your timeline or workspace, the other for full-screen previews.
- 4K resolution is worth the extra cost here.
Trading and Finance
- Two to four monitors in a wide arrangement.
- Often paired with a third or fourth screen for charts, news, and order books.
- Refresh rate matters less than screen real estate.
Should You Use Identical Monitors?
Short answer: it’s nice but not required.
Identical monitors give you a cleaner look, matched colors, and a seamless feel when you drag windows between them. If aesthetics or color accuracy matter to you (especially for design work), match them.
That said, many people happily mix monitors. As long as the resolutions are reasonably similar and you adjust the scaling so text size matches, mismatched dual monitors work fine. The most common mismatch is a high-end main monitor paired with an older one for email and notes. There’s nothing wrong with that.
If you’re mixing, try to:
- Keep the resolutions within one tier of each other (don’t mix 1080p with 4K if you can help it).
- Match the panel size within a few inches.
- Calibrate the brightness and color so they look similar.
How to Set Up Dual Monitors on a Laptop
Adding an external monitor to a laptop is one of the fastest productivity upgrades you can make. Here’s the quick version:
- Find the video output on your laptop. This is usually HDMI, USB-C, or Thunderbolt.
- Plug in the cable to the laptop and the external monitor.
- Turn on the monitor.
- Open display settings and choose Extend so the laptop screen and external screen work as one continuous workspace.
- Arrange the screens to match how they sit physically.
If you want two external monitors plus your laptop screen, you may need a USB-C docking station or a DisplayLink adapter. Some laptops support multiple displays natively, but many cap out at one external monitor through their built-in ports.
For laptops with limited ports, a Thunderbolt dock is one of the cleanest solutions. You plug in one cable and get power, two monitors, USB ports, and Ethernet all at once.
Advanced Tips: Vertical Monitors, Triple Monitors, and More
Once you’ve gone dual, it’s hard not to think about going further. Here are some advanced configurations to consider.
Vertical Monitor Setup
Rotating one monitor 90 degrees gives you a tall, narrow workspace that’s perfect for:
- Reading long documents
- Coding
- Twitter and social feeds
- Reading PDFs and articles
Most monitors with VESA mounts can rotate. You’ll need to enable portrait mode in your display settings.
Triple Monitor Setup
Three monitors are great for traders, streamers, and creators. The middle screen is usually your main, with the side screens used for reference, communication, and tools. You’ll need a graphics card with three video outputs, which most modern GPUs have.
Ultrawide as a Second Monitor
Some people pair a standard 27-inch monitor with a 34-inch ultrawide. The ultrawide acts like two displays in one, while the second monitor handles auxiliary apps. It’s a hybrid approach that gives you flexibility.
Daisy-Chaining With DisplayPort or Thunderbolt
If your monitors support MST (Multi-Stream Transport) or Thunderbolt, you can daisy-chain them, meaning one cable goes from your computer to the first monitor, then a second cable goes from that monitor to the next. This dramatically cleans up cable clutter.
Frequently Asked Questions About Dual Monitors at Home
Do I need a special graphics card to run dual monitors?
Not usually. Most modern desktops and laptops support dual displays out of the box. Only very basic or older systems may struggle. If your computer’s integrated graphics can’t handle two monitors, a budget dedicated graphics card will solve that.
Can I use two different brands of monitors?
Yes. Mixing brands works fine as long as the resolutions and ports are compatible. You may need to fine-tune brightness and color so they look similar.
Will two monitors slow down my computer?
Slightly, but it’s rarely noticeable for office work. 4K dual monitors running at 60Hz or higher do put more load on your GPU, especially in games. For most home users, the impact is minimal.
Do dual monitors use more electricity?
Yes, a little. A typical 24-inch monitor uses about 20 to 30 watts. Two monitors running 8 hours a day will add only a few dollars per month to your electricity bill.
Is dual monitor setup good for gaming?
Absolutely. Many gamers run their game on the primary screen and use the second for Discord, music, browser, or stream chat. Just remember that running games across two monitors (instead of on one) is rarely worth the hassle because of the bezel in the middle.
How far apart should dual monitors be?
The closer the better, with no gap. Push them right up against each other so the bezels touch. This keeps your viewing area continuous.
Can I use my TV as a second monitor?
Yes, with caveats. Most modern TVs have HDMI inputs and work as displays, but they often have higher input lag and lower refresh rates than dedicated monitors. They also tend to oversaturate colors. For occasional use, a TV as a second screen is fine. For daily work, a real monitor is better.
What if my laptop only has one HDMI port?
You can add a second monitor through USB-C, a USB-to-HDMI adapter, or a docking station. Software like DisplayLink lets you add more screens than your hardware natively supports.
Final Thoughts
Setting up dual monitors at home is one of those upgrades that pays for itself within a week. You stop fighting your screen for space, your work feels faster, and your home office actually starts to feel like a real workspace. Whether you go with two budget 1080p screens, a matched pair of 4K panels, or a creative mix of sizes, the basic process stays the same: check your ports, get the right cables, plug everything in, and adjust your display settings.
Once you’ve used a dual monitor setup at home for a few days, you’ll wonder how you ever managed with just one screen. Take the time to get the ergonomics right, calibrate your displays, and tidy up your cables, and you’ll have a workstation that’s comfortable, efficient, and built to last for years.