How to Secure Your Wi-Fi Network Properly
Secure your Wi-Fi network the right way with 10 proven steps that stop hackers, protect your devices, and close the gaps most routers leave open.
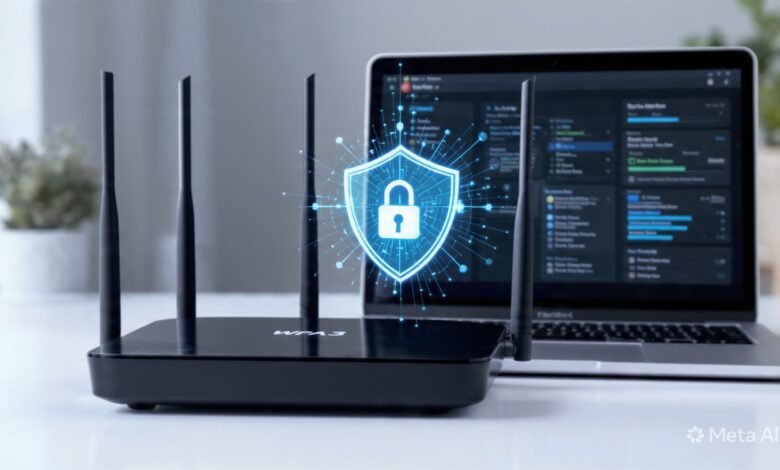
Every device in your house talks to the internet through one small box sitting on a shelf. Your phone, your laptop, the smart TV, the baby monitor, maybe even the fridge. If that box isn’t locked down, none of the devices behind it really are either. That’s the uncomfortable truth about home networking: the weakest link usually isn’t your phone or your bank’s website. It’s the router you set up once, three years ago, and never touched again.
Most people assume Wi-Fi security is either “already handled” by their internet provider or too technical to bother with. Neither is true. Internet providers ship routers with default settings that are convenient, not secure, and the actual fixes take about the same amount of time as reading this paragraph twice. You don’t need a computer science degree. You need about 30 minutes and a checklist.
This guide walks through exactly how to secure your Wi-Fi network properly, step by step, starting with the changes that matter most. We’ll cover passwords, encryption standards like WPA3, firmware updates, guest networks, router placement, and the smaller habits that separate a hardened home network from one that’s basically an open door. By the end, your setup will be ahead of the vast majority of homes still running on factory defaults.
Why Wi-Fi Security Actually Matters
It’s easy to think of Wi-Fi security as something only businesses or “important” people need to worry about. That’s backwards. A home network is arguably a softer target than most corporate ones, because almost nobody audits it.
When someone gets onto your network, they don’t just get free internet. They get a front-row seat to everything happening behind your router:
- They can watch unencrypted traffic and pull out passwords or personal details
- They can access shared files, printers, or network drives
- They can hijack smart home devices like cameras and baby monitors
- They can use your connection to launch attacks on other people, which then get traced back to you
- They can install malware on connected devices and quietly sit there for months
The Federal Trade Commission has pointed out that home networks often carry a mix of computers, phones, and IoT devices, and that basic steps go a long way toward keeping all of it protected from theft and intrusion (FTC Consumer Advice). This isn’t a hypothetical. Botnets built almost entirely from hijacked home routers and cameras have been used to knock major services offline, and the entry point in most of those cases was nothing more exotic than a default password.
Step 1: Change the Default Router Admin Login
This is the single most overlooked fix, and it should be first on any list about how to secure your Wi-Fi network. Every router ships with a default username and password, something like “admin/admin” or “admin/password.” These aren’t secrets. They’re printed in the manual, listed on the manufacturer’s support site, and baked into public databases that anyone can search.
If you’ve never logged into your router’s admin panel and changed this, assume someone could get in without even trying hard.
How to do it:
- Find your router’s IP address (usually printed on a sticker on the device, often something like 192.168.1.1 or 192.168.0.1)
- Type that address into a browser to reach the admin login page
- Log in with the default credentials
- Go to the administration or management settings
- Set a new username and a long, unique password
- Save and reboot the router
This is different from your Wi-Fi password. One controls who can connect to your network; the other controls who can change your network’s settings. Both need to be strong, and they should never be the same.


Step 2: Use WPA3 Encryption (or WPA2-AES as a Minimum)
Encryption determines how hard it is for someone nearby to intercept and read the data traveling between your devices and your router. Not all encryption is equal, and this is where a lot of older routers quietly fail people.
Here’s the hierarchy, from worst to best:
- WEP – Cracked in minutes with free tools. Should not exist on any network in 2026.
- WPA – An improvement over WEP, but still outdated and vulnerable.
- WPA2-TKIP – Weak. Avoid it if your router offers a choice.
- WPA2-AES (WPA2-PSK) – Solid and still acceptable for most home use.
- WPA3 – The current standard, and the one to choose whenever your router and devices support it.
WPA3 brings meaningful upgrades over WPA2. It requires an attacker to interact with your network for every single password guess, which shuts down offline dictionary attacks that used to make weak passwords crackable in bulk. It also uses forward secrecy, meaning that even if someone eventually captures your encrypted traffic and later figures out your password, they still can’t decrypt data captured earlier. CISA recommends checking that your router uses either WPA3 Personal or WPA2 with AES, and treating anything older as a signal that it’s time to upgrade or contact your provider (CISA Securing Your Home Wi-Fi).
To check or change this setting:
- Log into your router’s admin panel
- Look for “Security,” “Wireless Security,” or “Encryption”
- Select WPA3-Personal if it’s available, or WPA2-AES if not
- Avoid any option labeled WEP, WPA, or “mixed mode” long-term
If your router doesn’t offer WPA3 at all, that’s a strong hint it’s aging out and worth replacing in the next year or two.
Step 3: Build a Genuinely Strong Wi-Fi Password
A strong encryption standard doesn’t help much if the password behind it is “family2024” or your street address. Weak passwords remain one of the most common ways networks get breached, because they fall to automated guessing tools almost instantly.
A good Wi-Fi password should be:
- At least 16 characters long — length matters more than complexity tricks
- Not tied to your name, address, birthday, or anything findable online
- Not a single dictionary word, even with numbers tacked on the end
- Unique — not reused from your email, bank, or any other account
A practical approach is to string together four or five unrelated words with a couple of numbers or symbols mixed in. Something like a random phrase is far harder to crack than a shorter password stuffed with substitutions like “@” for “a,” which automated cracking tools already account for.
Step 4: Rename Your Network (Change the Default SSID)
Your SSID is the name your network broadcasts to nearby devices. Manufacturers often set this to the brand and model number by default, like “NETGEAR54” or “Linksys-Router.” That might sound harmless, but it actually tells anyone nearby exactly which router model you’re using, which means they can look up known vulnerabilities for that specific device.
When renaming your SSID:
- Pick something generic that doesn’t reveal the manufacturer or model
- Avoid using your name, apartment number, or address
- Don’t get cute with anything identifying — a funny name is fine, personal details are not
Hiding the SSID entirely is sometimes suggested as an extra step, but it offers limited real protection. Any attacker using basic scanning tools can still detect a hidden network, and hiding it can cause connection issues on some devices. It’s not worth the hassle. Focus your effort on encryption and password strength instead.
Step 5: Keep Your Router’s Firmware Updated
Firmware is the software running your router, and like any software, it has bugs. Manufacturers patch security flaws through updates, but unlike your phone or laptop, routers rarely nag you about it. Most people set their router up once and never think about it again.
A well-known 2020 study by Fraunhofer FKIE found that the vast majority of tested consumer routers carried known, unpatched vulnerabilities, many of them rated high severity. That’s not a one-off statistic. It reflects how routers are treated: installed and forgotten, while the software running them ages for years.
To stay current:
- Check your router’s admin panel for a firmware or software update section
- Enable automatic updates if the option exists
- If it doesn’t, set a calendar reminder to check manually every few months
- If your router hasn’t received an update in over a year and is more than four or five years old, consider replacing it
Old firmware is one of the quietest ways networks get compromised, because there’s no obvious warning sign. The vulnerability just sits there until something exploits it.
Step 6: Set Up a Separate Guest Network
Most routers support a guest network, and it’s one of the more underused features out there. A guest network gives visitors internet access without letting them touch your main network, your files, or your other devices.
This matters for two reasons. First, you don’t want to hand your primary Wi-Fi password to every houseguest, contractor, or delivery person who asks. Second, and more importantly, it’s the ideal place to put your IoT devices.
Why IoT devices need their own space:
Smart cameras, thermostats, speakers, and plugs are frequently built with weaker security than your phone or laptop. Many rarely receive firmware updates at all. If one of these gets compromised, and it happens more often than people expect, it shouldn’t have a direct path to your laptop, your banking apps, or your work files. Segmenting IoT traffic onto its own network limits the blast radius if something does go wrong.
Setting this up:
- Log into your router’s admin panel
- Look for “Guest Network” or “Guest Wi-Fi”
- Enable it and set a separate, strong password
- Confirm that guest network isolation is turned on, so guest devices can’t see or reach devices on your main network
- Connect smart home gadgets to the guest network instead of your primary one
Step 7: Disable WPS and UPnP
Two features that sound convenient but tend to work against you:
WPS (Wi-Fi Protected Setup) lets you connect a device by pressing a button or entering a short PIN instead of the full password. The problem is that the PIN method has known flaws that let attackers brute-force their way in fairly quickly. Since it also opens up your main password to compromise, most security guidance recommends switching it off entirely.
UPnP (Universal Plug and Play) automatically opens ports so devices can talk to the internet without manual configuration. It’s convenient for setting up a new game console or smart speaker, but it also means devices — and any malware that infects them — can open network ports without asking permission first. CISA specifically flags UPnP as a feature threat actors can exploit to spread malware and remotely control devices on a network (CISA Home Wi-Fi Guidance).
What to do:
- Open your router’s admin settings
- Find WPS and switch it off
- Find UPnP, usually under advanced or NAT settings, and disable it
- If a specific device needs a port opened later, do it manually rather than leaving UPnP on permanently
Step 8: Turn Off Remote Management
Remote management lets you log into your router’s admin panel from outside your home network, over the internet. It sounds useful if you ever want to tweak settings while you’re away, but it also means anyone on the internet, not just people in your house, has a route to try logging into your router.
Unless you have a specific, ongoing reason to manage your router remotely, this setting should stay off. Look for “Remote Management,” “Remote Access,” or “Web Access from WAN” in your admin panel and disable it if it’s on. Most home users will never notice its absence.
Step 9: Use a Firewall and Watch Your Connected Devices
Most modern routers include a built-in firewall, often called an SPI (Stateful Packet Inspection) firewall. This should be enabled by default, but it’s worth confirming in your settings rather than assuming.
Beyond the firewall itself, it’s worth periodically checking the list of devices connected to your network. Nearly every router admin panel has a page showing every device currently connected, often labeled “Connected Devices” or “Attached Devices.”
Warning signs to watch for:
- Devices you don’t recognize on that list
- Unexplained slowdowns in your internet speed
- Devices randomly disconnecting and reconnecting
- Router settings that changed without you touching them
If something looks off, that’s the moment to change your Wi-Fi password immediately and review every setting covered in this guide.
Step 10: Enable Two-Factor Authentication Where You Can
This one goes slightly beyond the router itself, but it belongs on any list about network security. Two-factor authentication (2FA) adds a second verification step, usually a code from an app, beyond just a password. Enable it anywhere it’s offered:
- Your router’s admin account, if the manufacturer supports it
- Your Wi-Fi provider’s online account
- Cloud storage tied to your home network
- Smart home apps controlling your connected devices
Authentication apps are generally a better choice than SMS codes, since text messages can be intercepted through SIM-swapping attacks. Even if someone eventually gets hold of a password, 2FA gives you one more locked door between them and your accounts.
Router Placement and Physical Security Matter Too
Digital settings aren’t the whole picture. Anyone with physical access to your router can factory reset it and use default credentials to get back in, undoing every change you’ve made. A few physical habits help close that gap:
- Keep your router in a private area of your home, not somewhere visible or accessible to visitors
- Avoid placing it right next to a window or exterior wall, which can extend your signal further outside your home than necessary
- If you live in a shared building, consider whether the signal reach genuinely needs to cover common areas
None of this replaces the digital steps above, but it’s a reasonable extra layer, especially in apartments or shared housing.
When It’s Time to Replace Your Router
Not every problem can be fixed with a settings change. If your router is more than four or five years old, it may no longer receive security patches at all, regardless of how diligently you check for updates. Combine that with a lack of WPA3 support, and you’re looking at hardware that’s fundamentally behind on security, not just outdated in its configuration.
A modern router with Wi-Fi 6 or 6E, built-in WPA3 support, and automatic firmware updates typically costs somewhere in the range of $100 to $250. That’s a reasonable investment given how much runs through that one device: banking, work logins, smart home cameras, and every conversation your smart speaker overhears.
A Quick Reference Checklist
If you want the short version to work through in one sitting, here it is:
- Change the router’s default admin username and password
- Switch encryption to WPA3, or WPA2-AES if WPA3 isn’t available
- Set a long, unique Wi-Fi password (16+ characters)
- Rename the SSID to something generic, with no personal details
- Update the firmware, and enable automatic updates if possible
- Set up a separate guest network for visitors and IoT devices
- Disable WPS and UPnP
- Turn off remote management
- Confirm the firewall is active and periodically review connected devices
- Enable 2FA on your router account and related services where available
Working through this list takes about half an hour for most home setups, and it puts you well ahead of the majority of households that never touch their router settings after the initial install.
Conclusion
Securing a home Wi-Fi network doesn’t require deep technical knowledge or expensive equipment. It requires working through a handful of settings that most routers already have, but that almost nobody changes after setup: replacing default admin credentials, switching to WPA3 or WPA2-AES encryption, building a genuinely strong password, keeping firmware current, isolating guest and IoT traffic on a separate network, and turning off convenience features like WPS and UPnP that quietly expand your attack surface.
Add in basic habits like watching your connected devices list, enabling two-factor authentication, and being thoughtful about where your router physically sits, and you’ve covered the areas that actually get exploited in the real world. None of these steps are complicated on their own. Taken together, they’re the difference between a network that’s an open door and one that’s genuinely hard to break into.